Friday, November 30, 2012

More Hand Hewn Beams

There has been lots of interest in my previous post about hand hewn beams so when I started my latest project I took lots of pics. This first one just shows how I cut down to the chalk line to get a flat surface. If you haven't read the old post I start out by using a spirit level to mark each end after stabilizing the log, then chalk a line down each side connecting the level marks. I came up with a better method of holding the log steady while marking it. It is imperative that the log does not move while it is being marked.
I made three of these. I nailed a pair of them onto blocks of firewood to raise the log up to a comfortable working height while marking and sawing. I use the third one to stabilize the log while I am chipping down to my mark with the adz. They are quick and easy to make and really work well. If you do make them keep the nails straight up and down or they will bend when you slam the log down to stabilize it.

Here is a pic that shows the log on the holder. They made keeping the log steady while marking and cutting easy. I needed six beams for  floor joist on this project so it was well worth the few minutes it took to make them. I just used a common nail for the holding spikes but a hard nail would probably be better as these bend if they hit a knot. I did slam the log down pretty good to make sure it didn't move.


Since this shed is being built on a pair of recycled power line poles I didn't need the other side to be flat other than where they set onto the poles.I flipped the log over after flattening one side and marked another line parallel to the flattened sign. I checked the small end of each log to establish a minimum thickness that all my logs could meet. In my case that was four inches.  Sometimes logs will warp after one side has been chipped off. There is not much to do about it but chipping off the opposite side might help. I had one warp but I just made another and will use the warped one for something else.
Here is another view of the notches I put on the bottom.
And here a couple pics of the one log I needed square on one side. I used a carpenters square to mark a right angle on both ends. I made the chalk mark down the top first and then made the square mark and then connected the marks on the bottom.
I then turned the log on it's side and sawed down to the marks the same as the first side. This one came out with a slight twist. This is usually caused buy the chalk line being off somehow ;either because the end level lines don't match because something moved, or the chalk line was thrown off by hitting some obstruction such as a knot that protrudes. Regardless of the cause it is a problem that can be corrected. After figuring out which side is off and where it is off, chalk another line to straighten it up and rechip it to the new line.

                                       
If you don't have a chain saw you can use whatever you have. I used this bow saw for some of my cuts.


Wednesday, November 28, 2012

Road Trip Wednesday

Here are two of our recent additions to the homestead, a pair of Huacaya Alpacas . They were the reason for our 6 hour road trip to eastern Wisconsin today. The one facing me is the female, Maybell and the one that has his back to me is the male, Goldie. The llamas who were next door all came in to meet their soon to be pasture mates. We now have five alpacas. I will try to get some better pics of the whole herd soon. It was a nice day for a drive and we haven't been to the eastern part of the state very often.
Here is a pic of me with the Green Bay part of Lake Michigan behind me. You can just make out dark patchs on the horizon, that is the Door Peninsula  We were out on a breakwater near the Oconto WI. harbor. The wind was very,very refreshing! We did not spend much time sight seeing since we were expected to pick up the alpacas. I did snap a few pics , Ann next to a anchor display and a Bald Eagle.
We hope we will be able to explore that part of the state a little more this coming summer.


Not sure who looks colder,Ann or the eagle!


Monday, November 26, 2012

Still Busy

Here is a pic of something a bit unusual, a triple yoke egg. We have a pullet that is just starting to lay and she gives us double yoke eggs all the time. This was a surprise as I have never seen a triple yoke egg before. The pullet is apparently into" less packaging".
 Holidays are great and I really enjoyed Thanksgiving but they sure do wreck your daily routine. Sunday we took our son Dane back to school, he was home for a few days. That used up most of  Sunday so today was catch up day. Back on the fire wood making detail, haul in some water, switch some batteries around etc.
 We had some brightly colored visitors at the feeder not long ago. These are Evening Grosbeaks. For some reason we don't get them at our feeder very often. There were a dozen or so here for a couple hours and that was it. I was hoping they would stay around for a while.
 We want to have the llamas and alpacas a little closer to home for the winter so we have a rush project now. We are building a large fenced area plus a "corral" area for them to spend the winter in.The rush part comes in because we have to get in all the posts before the ground freezes to deep. The frost is only a inch or so thick right now but that could change fast if it gets colder. We started cutting posts today and will start driving some in tomorrow. I thought things were going to slow down a bit but not yet I guess.

Friday, November 23, 2012

Mud Oven Thanksgiving.

With the unusually high temperatures we had for the last few days,it seemed like a good time to use our mud oven for some of our Thanksgiving Day meal and avoid having the house be 95 degrees when our guests arrived. Ann started a batch of bread Wedenseday evening and I got busy firing the mud oven. The real key to success is having fire wood that is absolutely dry. Mine was not as dry as it should have been which means I had to fire longer to get the heat up there. We had to keep the bread dough a little cool until I had the oven hot enough.
It only took me about a extra half hour and then the bread went in. As you can see it came out just fine. By the time the bread was done the oven temperature had dropped back to about 275F. so I started firing again while Ann got the turkey ready to go in. We did check before hand to make sure the pan would fit, it was close but do -able. I fired with some nice small wood which was a little drier and was able to slide the turkey in to a 450F. oven about 9:00 pm. Soon after it was off to bed .
  Next morning a trip straight out to the oven was in order. I was glad to see the temp. was still over 250F. When I opened the outer door I was greeted by the very nice aroma of roast turkey. I popped out the inner door and peeked in, every thing looked good.I slide out the pan and Ann lifted off the cover. A beautiful golden brown bird rested inside. Horay, Thanksgiving dinner was on track!
 Ann did her usual fantastic job of cooking and put a great spread on the table as our family gathered here with us.
Other than the turkey most of the meal was grown here on the homestead. We would have butchered  our own turkey but he is a three year old tom so we thought we would buy a younger one.
 We were going to bake the pies in the mud oven to but it needed to be brought back up to a higher temp and we were running out of time. They went in the cook stove oven and came out great also. The best part of having dinner at your house is that you have the left overs!


Has any one ever complained about leftover pumpkin pie? I'm not.

Wednesday, November 21, 2012

Herbal Medicine

Quite time is slowly approaching here on the farm. Still doing a little cleaning up in the gardens since we don't have any snow yet. We butchered hogs a couple weeks ago and I just got done curing and smoking the hams and bacon yesterday. Fire wood is a every day job right now, the wood shed isn't as full as I'd like yet. I have a few building projects on my schedule and I'll be doing some more hand hewn beams for those next week.
 Ann and I have both been interested in medicinal plants for decades. While we seem more in tune with the wild edibles now, we have a hard time passing up medicinal herbs without harvesting a little. This pic shows a few we pick every year. Heal-All, Yarrow, and St. Johns Wort are nice to have on hand and Wild Bergamot makes a nice tasting tea.There are dozens of others we keep on hand, Red Clover Blossoms, Mullein, Boneset, and all the mints. I use the inner bark from the black cherry tree in my cough syrup, I will be gathering some of that soon. We gathered some Usnea , a lichen that is widely used medicinally, last weekend. We have some Chaga and Turkey Tail on hand so we are good there.
 Every one has to decide for themselves weather there is any benefit to using these herbs. We certainly are not going to abandon antibiotics to treat infections or give up western medicine for surgery. I think being involved in herbal medicine makes a person more aware of what is going on with your own body, that can only be good for you.


Friday, November 16, 2012

Pump Leather

no.1
We use a small pitcher pump like this one to pump water from a cistern. It is a inexpensive pump for jobs like that. It is made entirely from cast iron with the exception of one part, the pump leather. Amazingly enough the pump leather is made of...wait for it.. leather! So, we have a piece of wet leather rubbing up and down in a cast iron cylinder, needless to say ,this part needs replacement every so often.Replacing it is a relativity easy job, the entire top is held on by one big set screw. Loosen that up and the assembly shown in the pic comes right off. The piston portion of this is easily removed by simply turning the piston shaft so that the handle is disconnected and then pulling it down through the cap.

This pic shows the piston portion taken apart. Right to left you have the piston with the shaft,the intake valve, the old pump leather, and the pump leather retainer. This retainer is threaded into the bottom of the piston and removing it is the most difficult part of the job. I clamp the piston in a vise and use a hammer and punch to gently tap it until it loosens. If you have another pump leather you now place it on the piston, slide the intake valve back in place, and screw the retainer back on. Note that ,"if you have another pump leather", I didn't.
I did have some nice thick cow hide leather however. That would be that tannish circle in the previous pic.This pic shows that piece of leather placed where you would put the pump leather. To make this into a pump leather it needs to be cup shaped so that as the piston starts to lift the water the side of the cup flare out and create a seal against the sides of the cylinder. Getting the leather to assume that shape is as easy as boiling water.

Once you have a pan of water boiling, immerse the piston with the soon to be pump leather into it. It will soon curl up around the sides of the piston. While it is still hot ,slide it into the pump cylinder and leave it cool.


You should end up with something like this, a pump leather! Please note, it WILL NOT  last as long as a bought pump leather.It will also not cost you $12.00 which is what they want for one at the only place around here that has them and is 50 miles away.


Saturday, November 10, 2012

DIY Fiber Tumbler

Here are some pics of my homemade fiber tumbler. If  I compare my cost to the prices I see for similar machines, I saved somewhere between $1000.00 to $3000.00 building my own! To be fair that doesn't count labor or the materials I had and didn't have to buy specifically for this project.The materials I bought were; one 4x8 sheet of 5/8 plywood, 4- 2x2-8 ft. long, 4- 2x4-8 ft. long, and some nails. This stuff cost me about $92.00. I had on hand; 12 ft. of 1 inch hexagon wire, what we call poultry netting, some metal pallet banding,two bearings for
the drum, two other small shafts with bearings and pulley, three used v-belts, and a old used electric motor. This pic shows the arrangement of pulleys and belts to reduce the speed of the drum.The motor runs at 1725 rpm. and the drum turns about 26 times per minute. There is about a 67/1 ratio between the motor and the drum speed. This seems just about right, the fiber is carried up and drops just a little past top dead center. The arrangement of the pulleys allows an increase in tension on the motor to be transmitted to all belts thus keeping them all from slipping. This drum is 36 inches wide which was determined by the fact that the wire I had was that width. The ends are 48 inches across from point to point of the panels. A 2x2 goes across at each point. The door is framed with 2x2 also and fits between the frame 2x2s. I used the old pallet banding over the edges of the wire to help secure it to the edge of the plywood and also to cover the edges of the wire on the door. I used the term bearing very loosely , one of them is merely a hardwood block that is impregnated with used motor oil.
Here is a pic of  the inside of the tumbler, note the three large pole barn nail 'fingers' that help fluff up the fiber. There are 15 of these, somewhat randomly placed so that none line up with each other exactly.The door is held in on one end by two pins that align with holes in the door frame. Two short bolts thread into metal inserts to hold the other end.This allows the door to be completely removed so it is not in the way when removing fiber from the tumbler.The fiber shown in the drum is from Sandy, our guard llama.
Here is another view of the pulley setup. I will put a guard over the pulleys and we will give it a coat of varnish . Then all I have to do is find room to house it!


Tuesday, November 6, 2012

Our First Alpaca

Here is a pic of one of our new critters. He is an alpaca, Ann has named him"Charmin", he is squeezable soft, for those who remember that commercial. We will be getting two more alpacas later this month.
Charmin was sheared earlier this year , this style of clip is called a blanket cut. It is amazing how soft and lustrous their fleece is. We have raised Shetland sheep, they have a very fine, soft fleece and the llamas have even softer fleece but neither compares to the softness of the alpaca fleece. Ann is chomping at the bit to get some of it to the spinning wheel. We acquired several fleeces a couple of weeks ago and she is itching to get them processed. I am building a tumbler which should speed up our processing quite a bit.
Here is Sandy, our guard llama. He has been doing guard duty with several calves and some goats for several months. Those have all been sold or moved to other pasture so Sandy was getting lonesome. He accepted Charmin as his new ward right off. When I walked out to snap this pic of Charmin he was quick to get in between us. He is not aggressive towards people he recognizes but he definitely wanted to see if I belonged in his pasture. Dogs and any other critter he doesn't recognize are advised to detour around his bailiwick.


Sunday, November 4, 2012

Dye With KOOL-ADE


Here is an article Ann wrote a few years ago.


KOOL-AID WOOL
     

           For years I owned Shetland sheep, and had all the beautiful naturally colored wool that I wanted. That is if I just wanted white, grays, browns, or blacks, or mix, or blend of any or all these colors. I was happy to spin with these beautiful colors for a long time. But just like anything else your passion wants to grow.
       One afternoon at my spinning group, one of the gal's brought up the subject of dyeing their yarn. I though why would I want to dye my beautiful wool that is already colored, I'm ahead of the game, right?  But the more I thought about it, the more I liked the possibilities that dyeing could open up. I could have reds, yellows, greens, blues, or a blend of both natural colors and dyed, I could have the rainbow at my fingertips.
       So to start to learn how to dye, I  wanted to start  with a simple dye. It had to be a dye that I could get easy, work with easy, and easy to understand, then I heard about dyeing with Kool-aid.  Anyone that has had children and has given them Kool-aid knows how hard it is to remove Kool-aid from little hands and mouths.
             
            Getting started is fairly easy, you will need to choose your fiber. Kool-aid only works on natural fibers: wool, mohair, llama, alpaca, cotton, your hair, [  green for St. Patties Day]. It doesn't work  on  synthetics. You do not have to use just white fiber. Because I have a wide variety of natural colored wool to choose from, I can choose to dye just white yarn or, dye gray yarn with grape or, blue raspberry to get an heather or steel blue. Put black cherry on dark brown to get a mahogany color, mix your colors, just let your imagination go.
    It doesn't  matter if you dye spun yarn, unspun fiber, or even commercial yarns. If you are going to use your colored yarn on a project, make sure that you dye enough yarn to complete it, other wise it can be a little difficult to get the same results if you run out when your are almost done with your project.

           While you are gathering up your equipment that you will need for dyeing , put you fiber, or yarn in hot water to soak for about 20 minutes . The fiber will take up the color better and more even when it is wet, but if you want to dye your yarn dry that is o.k., dry yarn does not soak up the dye evenly, so you may get mottled yarn. Dry fiber will even out when you card and spin it, also un spun fiber will not look as bright until it is spun.
         There are 3 ways to do kool-aid dyeing, the first is the stove top method, second, the microwave, and third, the kid friendly way using the sun. What you will need to dye, one ounce of fiber or yarn loosely tied into skeins, one package of unsweetened kool-aid per ounce of fiber, water, stainless steel or enamel pot, microwave safe dish, or gallon zip-lock bag, depending on your method of dyeing, long handled wooded spoon, rubber gloves, and your heat source. So lets get started dyeing.

         With the stove top method,  you first need to bring about 2 quarts of water just to boiling, add your unsweetened kool-aid, stir to mix throughly. Now take your fiber and  squeeze out the excess water, remember that your fiber is hot so be careful, now add your fiber to the dye pot. You will not need a mordant with kool-aid, as it is acidic enough on it's own.
          Gently squeeze the fiber with your spoon to make sure that the dye gets into all of the fiber. Let it simmer for 15-20 minutes. The neat thing about dyeing with kool-aid, is that when you are done dyeing, your dye water will run clear, no color will be left in the water.  Turn off the heat and let the mixture cool to room temp. Now take your fiber out of the pot and squeezing out the excess water, rinse fiber in water the same temp. as the dye pot water, and hang to air dry.

         The microwave method, You will need, 1 gallon size zip-loch bag, 1 pyrex dish, and a colander.  While your fiber is soaking in warm water, mix up your kool-aid dye, one package of kool-aid to 2 quarts of cool water.  Put this mix into your plastic bag, take and squeeze  the excess water out of your fiber, than add the fiber to your kool-aid bag.
         Squeeze your fiber, gently, in the bag to distribute the dye evenly to all the fiber. Place the bag in your pyrex dish, put it in the microwave, and microwave for 2-3 minutes on high. Let it rest 2 minutes, you can squish the bag again to make sure the dye is evenly distributed.
        Now carefully check to see if the liquid is colorless : Caution- when checking your fiber, be careful when you are opening your bag, as steam will escape from the top of the bag. Do not put your face or hands over the top of the bag. If the liquid is not clear put it back into the microwave for another 2 minutes, let it rest 2 more minutes. Do this until you dye water is clear. Now take your bag and dump the fiber into a colander to drain, squeeze out excess water, and  rinse with water the same temp. as the dye water, squeeze out excess water, and hang to air dry.
         The last method, sun dyeing, is a kid friendly method. You will need 1 or more children,  1 gallon zip-lock bag, 2 quarts of cool water,  one package kool-aid, one ounce of fiber per child, and the sun. Put your 2 quarts of  cool water and kool-aid into the bag close, and squish together to mix. Place the fiber onto the bag close removing excess air from the bag, and close, squish again to distribute the dye evenly through out the fiber.
         Take outside and put in a sunny place. Let the bag sit several hours, or all day if possible. Let the bag cool, take the fiber out and rinse in water of the same temp., squeeze out excess water, and hang to air dry.

         Now if you want to get a little more bold with your dyeing, get 2 one quart jars, one 9x13 cake pan, one large plastic bag, warm water, 1 ounce of wool, 2 different colors of dyes, make sure that the colors you choose will go together,[ like red and blue will make purple, yellow and blue will make green].
        Place your quart jars into the 9x13 cake pan, fill with warm water, add your kool-aid, one color per jar, and stir, now put  your pre-moistened fiber, into the quart jars, one end to each jar. Now carefully side pan with jars, into the plastic bag and close,[this to keep the fiber from drying out while the dye is taking], now wait.
        The colors will wick up the fiber on each end, and come together in the middle, that is why you need 2 colors that go together. Take the  jars out of the bag and remove fiber, rinse your fiber, and hang to air dry. You will have tie-dyed fiber.

           You can also use food dye that you get in the grocery store to dye your fiber. Just a couple  drops of coloring into 2 quarts of water, and ¼ cup vinegar per batch to acidify  your dye pot. Also try Easter egg dye, it is the same as with food dye, add ¼ cup a vinegar per batch, follow the steps as with the kool-aid.
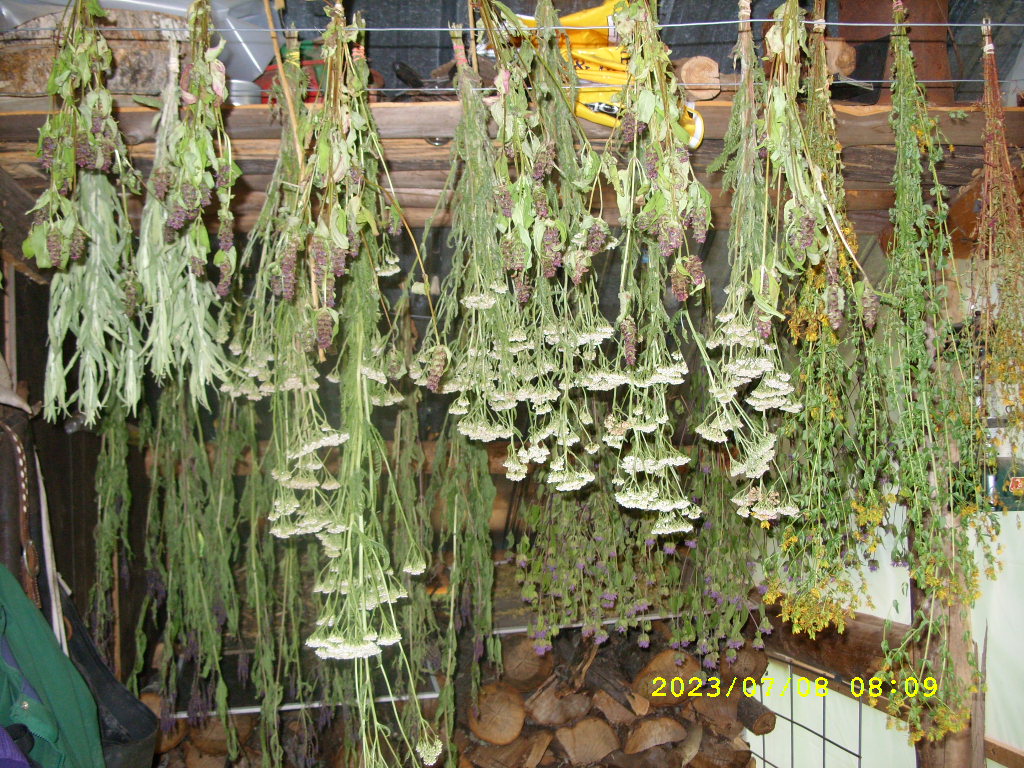
          Let you imagination go, and you'll be delighted in what beautifully dyed fiber that you can make. At first I thought that I would not like dyeing my beautiful naturally colored wool, but now that I have tried, I  love dyeing my wool. Now I am trying natural plant dyes that I can find in my area, or am able to grow in my garden.


Friday, November 2, 2012

Drop Spindle

Last week we acquired an alpaca to fill out our fiber herd and we will be getting two more later in the  month. On top of that we were also very fortunate in receiving a large quantity of alpaca and llama fiber in the form of raw fleeces. All that fancy fiber got me thinking about how the fiber was used and processed back in the llama/alpaca homelands in the Andes. I'm afraid I don't really know much on the subject other than a little about the original fiber spinning tool, the drop spindle. Anyone interested in the fiber arts should learn to use this basic tool. I have seen many pictures of women in that region spinning with a spindle while going about their business. I have certainly never gotten to that level of expertise but I can make some yarn, even if it is a bit lumpy! Drop spindles are reasonably priced and learning to use one is a fun activity.  If you have a little time making your own is not difficult either. You can make them as plain or as fancy as you would like.We sold these at one time and will be doing so again at some point along with fiber to spin. Until then check them out on the web, needless to say, there are thousands of sites about them.