Sunday, January 20, 2013

DIY Laundry Soap

 I have had the recipe for this homemade laundry soap posted for quite a while but since Ann was making a batch I thought I'd cover it in detail.  It is not free as most of the ingredients are bought but it is much cheaper than laundry detergent from the store. Ann is satisfied with the job it does, even in cold water, and it does not have a bunch of extra fragrances and fillers added. The soap needs to be soap, not detergent. Ann has used her homemade soap with good results. The other two dry items, borax and washing soda, both are detergents. They are both rather benign cleaning agents. Borax is hydrous sodium borate, and washing soda is sodium carbonate.  Ann sometimes also adds baking soda which is sodium bicabonate.  Just in case anyone actually cares, soap is a cleaning compound produced by saponifying a oil with a alkali. When caustic soda is added to the oil, glycerin separates out leaving sodium oleate, which is what we call soap.  The remaining ingredient is water. If you have very hard water I would recommend distilled water or some other water with a low mineral content.The recipe I have posted here is slightly different than our original one as it has evolved over time. Ann now makes a more concentrated version. Here it is;  To 6 cups of water add one bar of grated soap. [ 5 1/2 ounces in the case of the Fels-Naptha brand]. Heat the water /soap mix until the soap is melted, then add one cup each of borax and washing soda. Remove from heat and add four cups of boiling water. Once every thing is dissolved, pour into a bucket [ big enough to hold two gallons] and add one gallon and six cups  water . Let stand 24 hours to gel. Use two tablespoons per regular load.
 You can add baking soda if you would like, I don't know if it works better with it or not. This will do about  about 120 loads of laundry. The last time we checked the prices out this cost about 4 1/2 cents per load, that was about a third of what pre-made detergents would have cost us. 
 We work hard, gardening, working with cattle and other livestock, etc. so our clothes are DIRTY when they hit the laundry basket. This  size batch last us about six months.  

Monday, January 14, 2013

Rabbit Stew

Looks like it will be a all bunny diet around here for a while. Apparently this is the boom year for snowshoe rabbits in my area. The swamp is thick with rabbit runs and they are mowing down blueberry bushes and tree seedlings like there is no tomorrow. Either because of the presence of wolves in the area or a low in their cycle, predators like fox and coyote are not here this year. That leaves me to act as predator and bring their numbers down before they eat themselves out of house and home and destroy my orchard. Snowshoe rabbits are not the tastiest wild game you will ever eat but you can eat them, you just have to season it properly. Anytime you are cooking snowshoe rabbits the recipe should start with instructions to boil it for several hours or give instructions on how to sharpen your knives,you will need a sharp one! I believe the proper name of these critters is "Varying Hare" due to the fact that their color varies through the year, they are only white in the winter. If you live in jack rabbit country, this is the northern model. If you decide to eat them, use lots of onions and garlic. We have only got this one so far but we are saving the hides and will be tanning them once we have a few to work with. Although they do shed forever, rabbit furs are very warm and can be used for a variety of garments.

Thursday, January 10, 2013

DIY Snow Shoe Bindings

We don't have much snow yet but we always try to pack down trails as the snow accumulates. The bindings on my shoes gave up last year so when I dug them out this year of course they still needed new bindings. I have tried several different styles of bindings over the years but for me the ones shown in the pic are hard to beat. They are easy to put on, don't loosen as you are walking, and are easy to take off. When you add in the fact that they didn't cost me a penny because they are homemade, I don't know how you can come up with anything better. I did buy the nylon rope they are attached to the shoe with. I only used 4 feet of the 50 foot piece though so it wasn't much of a investment. The no cost part hinges on getting the industrial size tire inner tube the bindings are made from for free. Since a damaged tube is perfectly fine for this purpose it is not hard to get one free or very cheap.I ask my tire shop for one while I was there having new tires put on the family van and they were happy to let me take my pick from a pile of damaged inner tubes they had. These inner tubes are about a eighth of an inch thick. A car or light truck tube is not thick enough, it needs to be from a large farm tractor or construction equipment.
 Here is the pattern for a multi size binding. It can be made bigger or smaller depending on which of the sets of holes are used to lace it together.The little hole to the left is for pulling it over the heel of your boot, the next big hole is where your foot goes in. At the far right end is the portion that forms the bottom of the binding.That part folds under at the indented area and then laces to the "wings in the middle.

Start lacing it together with a foot long piece of some type of durable twine or light rope. I used the middle set of holes which will fit a size 14 leather work shoe. For pac boots I would go with the farthest out set of holes.


Fold the wide front part under, tuck the edge of it in until you can line up with the same set of holes on the center "wings'.Pull your line through those holes and tie it off.


Now do the other side the same way.


Use the same line to tie your binding to the shoe.


Push toe in through the big center hole, grab the tab with the little hole and stretch it back over the heel of your boot.
 I tried to figure out how to include a full size template for this but I haven't figured out how to do that. If anyone has a idea of how to do that leave me a comment or email me. I can measure it and give anyone who is interest those. Just email me and ask.

Monday, January 7, 2013

Pony Power

The drought here this past year is keeping hay prices out of sight. Many people are asking over double the price they got last year. Such high prices have forced us, and a lot of other people, to make tough choices.  Livestock markets are seeing near record numbers of cattle coming in.  Several of them were ours, including the steer Ann had been starting to train as a draft animal. Part of our long term goal has always included some type of draft animal. We thought that a oxen would be a good fit for us but these hay prices made us reconsider. Ann's pony, Sam ,had some of the basics down already when we got him. He is a quick study as you can see in the photo. Ann has been using him to haul in water and hay. We don't even have a bridle or bit for him and so Ann is driving him with just his halter on. He is learning his voice commands nicely. We are planning to make a little better harness using automobile seat belts for a lot of the straps. Since neither Ann or the pony have any driving experience, they are training each other ! A pony cart is on my project list along with the harness making. 

Thursday, January 3, 2013

Mud Oven Revisited

There has been lots of interest on my mud oven post over the last year so here is a bit of a how to on that. I started by building a level area with large rocks. This is to isolate the oven from direct contact with the soil to prevent moisture from being wicked up. Next I laid some old wire mesh across the rocks and then built a big " wafer" of mud- sawdust mix, this insulates the oven bottom. The wire mesh was put on to prevent the mud-sawdust mix from filling between the rocks. You use two types of material.

Either your basic clay-sand mud, or clay-sand with sawdust for the insulation layer.I did not have sawdust to add so used wood shaving that are sold for animal bedding. The entire oven is made of three layers. An outer layer of clay-sand mud, a middle layer of mud-sawdust mix to insulate the inner layer of clay-sand mud. Since I had them ,I put in  a layer fire brick for the oven floor. The inner layer absorbs the heat of the fire to provide the heat you cook with. The middle layer helps the oven retain that heat, the outer layer is the protective "skin".
To form the actual oven cavity I built a loss basket of willow twigs and covered that with flour paste soaked newspaper. After setting that in place I started building up the three layer walls.As you can see the oven cavity is big on mine. Too big to be efficient really. On the up side, we can bake five loaves of bread at a time and once it is hot it will retain heat until the next day. If I built another it would be smaller though. This size uses a quite a bit of wood to get hot. One important note here, The wood must be DRY. Dry as in absolutely totally dry because the last thing you put in the oven after you are done cooking is the wood for your next fire. And, split it small, you want a very hot fire.
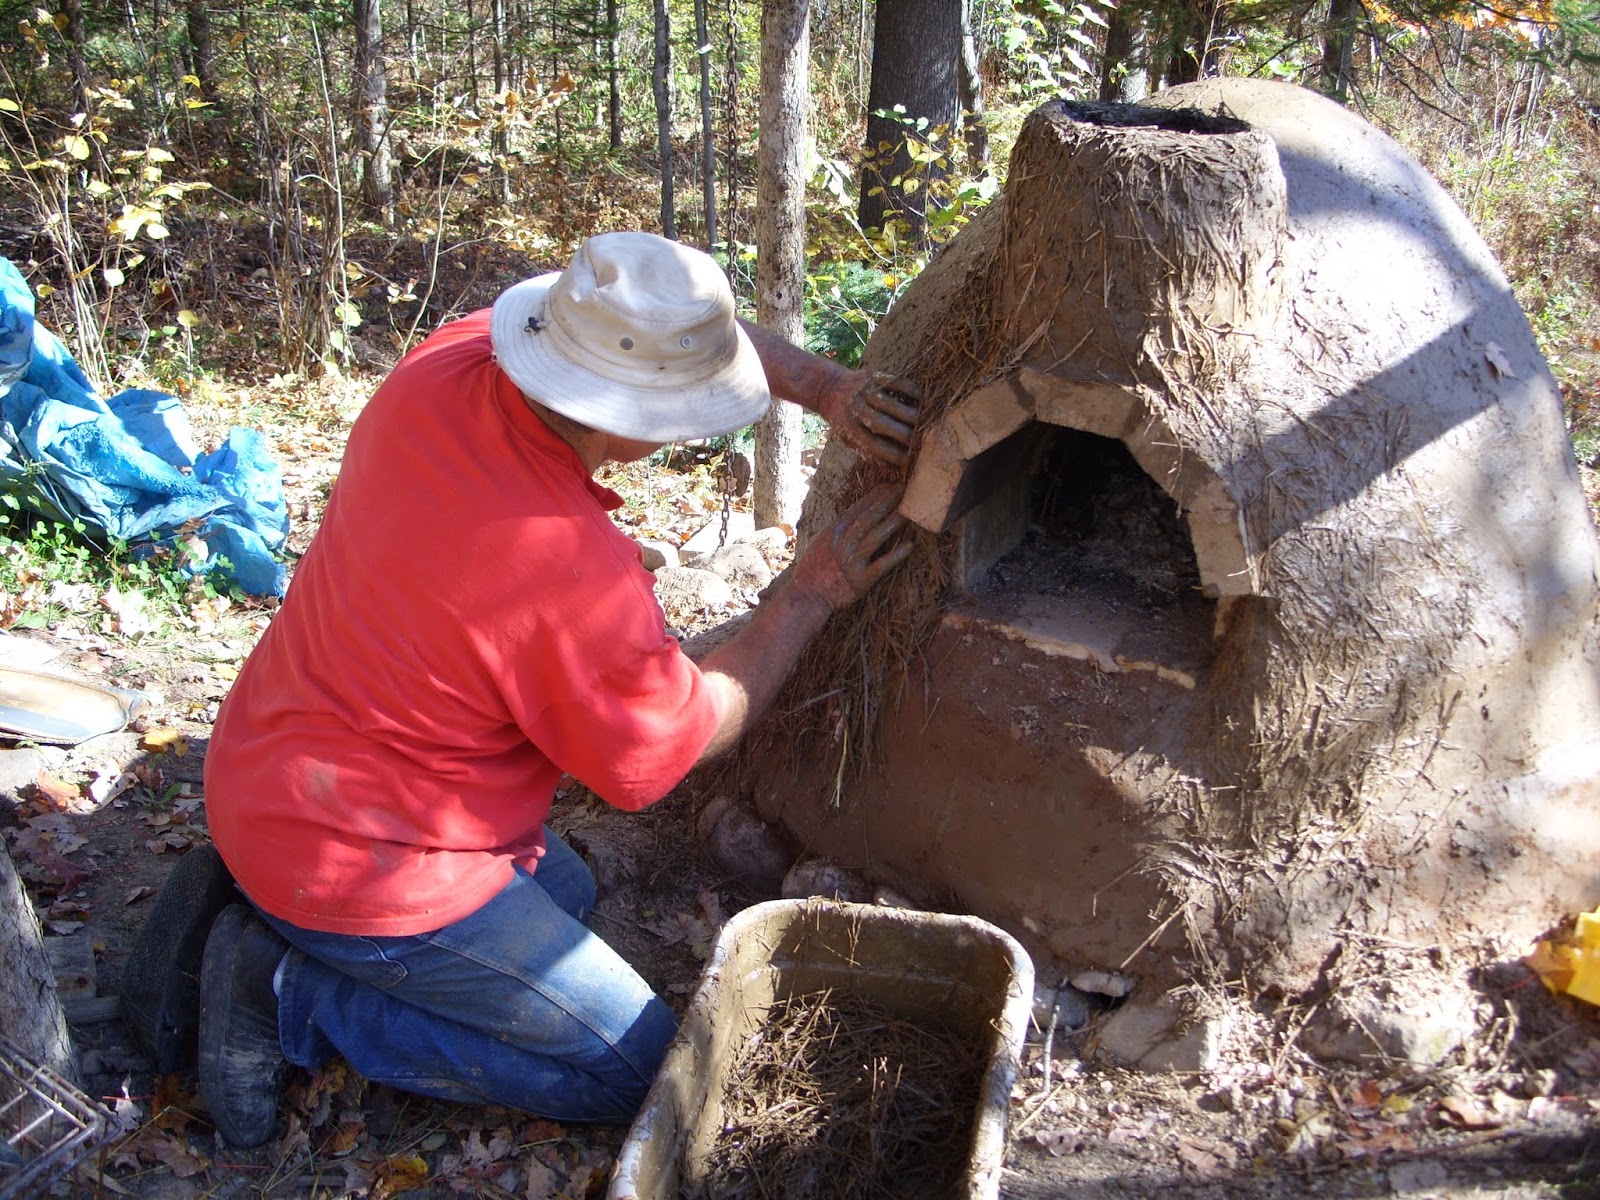
Here I am, almost to the top of the dome. I have started the door area. Check how big you need the door for any pan you might want to use. The thickness of the inner layer is going to determine how much thermal mass you have to heat and to store heat. On this oven I went about six inches. Keep the thickness of the layers uniform. Gauge the thickness with a marked piece of wood or a stick as you go.Your oven will need a tight fitting wood door. Build it first and then form the opening around it. The door is soaked in water for several hours each time you use it.
You do not have to have a chimney as this oven does. Since the climate here dictates that my mud oven be protected from the elements I added a chimney to vent the smoke out of the little shed I built around it. My oven is a plain jane . You can get very artistic if you want to. In the book, "Build Your Own Earth Oven", by Kiko Denzer, you will find all the details on building one of these.
After your oven is built it needs to dry out before you can get baking heat. Several small firings were needed before ours would get hot enough. There is a bit of a learning curve before you are proficient at gauging how much heat you have to work with.


Building my basket.


READY TO BAKE!


Friday, December 28, 2012

Herbal Cough Syrup

 At least once a year someone in the house gets a cold or the flu. It was me this year and I've been fighting the miserable thing all week. I prefer to use herbs to help lessen the symptoms rather than bought cold remedies. When I started coughing I got busy making a new batch of my cough syrup. We think it works as well as anything we have bought. One of the most important ingredients is the inner bark from the black cherry tree. I dug around in the cabinet we keep such things in and came up with all the ingredients except the cherry bark. Apparently I neglected to gather more when the last batch was used up. I should be thankful that it was the cherry bark I didn't have because I can gather that even though it is winter. If it had been any of the other ingredients I wouldn't have been able to find them now. It has been cold enough that the bark is frozen tight on the trees. I got around that by cutting a small branch and bringing it in to thaw. Once it had warmed up enough I pealed off strips of it's very aromatic bark. If you have the right tree, the inner bark should have a strong scent of bitter almond. Only the inner bark is used so the bark needs to be cleaned. Cherry bark is fairly easy to separate the inner bark from the outer. The pic shows me using a knife to peel off the outer bark. I will be bottling up my concoction today. It does take a few days to make it and of course I am just about over my cold, or at least I hope I am! The recipe is on the recipe page if you want to see what I put in it.
 Please be assured that this is not medical advice and you go see your doctor before doing anything radical like making your own herbal medicine.

Monday, December 24, 2012

Re purposing Old Knives

Having finally gotten most of the tasks I needed to get done out of the way, I have started on some other fun projects. I look for old knives at thrift shops and yard sales to recycle into other uses. I look for old carbon steel knives rather than stainless. The stainless steel is much harder to rework by hand.The top knife in the pic is one I cut down to hunting knife size and rehandled. I cut down and epoxy-ed the front leg bone from a deer for the handle and made the sheath from some scrap leather. The sheath is not much to look at but it does it's job.  The bottom knife is another I am going to cut down. It has a nice bone handle on it and is from a old meat carving set. I have no use for it as is but after it is cut down it will be very useful as a skinning knife since I can shape it to have a long belly curve.This one has very high carbon steel which is easy to test for. If you touch high carbon steel to a grinding stone and watch the sparks, it will tell you a lot about the steel. High carbon steel will throw very bright, almost white, sparks and they will bloom, or branch into multiple sparks. Don't stay on the grinding stone very long though or you will pull the temper out of the edge.I do not use any power tools on these so I don't have that worry. I start by putting the blade in a vise, aligned on the mark, with the part I want to keep below the jaws. I then wrap a piece of leather around the blade and strike it with a hammer. A carbon steel blade will snap right off at the vise. If necessary, I take several more small "bites" off the blade to get it fairly close to my desired shape. Make sure you wrap something around that blade, the piece that breaks off will be very sharp and will leave at a high rate of speed! After that it is just a matter of filing away at it until you have it nicely contoured. Once it matches the shape you want, start filing the blade to attain a thinner cutting edge and point. If you are after looks as well as function you will need to use progressively finer grades of sanding paper to get that mirror finish.  A lot of these old kitchen and chef knives have great steel in them, this is a great way to reuse them.
On a different note, I've been cracking nuts, black walnuts and hazelnuts, for Ann's holiday baking. Ann posted a recipe for one of the treats she made this year, Black Walnut Spread. I would call it nutella but that name is copyrighted of course. If you like that product you will love Ann's version. Scroll to the bottom of the Recipe page to see it.