Monday, May 20, 2013
Catch'in Up
Things are getting back to normal around here so I should have time to write a bit again. We have finally gotten into a more normal weather pattern and haven't had any snow or freezing temperatures for several weeks now. I managed to keep all my transplants in the greenhouse going and have started setting out all the cabbage, broccoli, kohlrabi,and brussels sprouts. All of those can take cooler temperatures as can the onions which we are started on .Potatoes and peas will be on the schedule after that and then the warm weather crops like tomatoes, corn, and peppers. We took a few days over the last few weeks for some foraging. Ramps are up in all of our usual picking spots but we haven't picked any yet. Ostrich fern fiddle heads should be up this week if temperatures stay warm. Not much for mushrooms yet although morels are about due to appear. We have been busy with a bunch of new projects but I'll save those for later this week. If anyone in the northcentral Wisconsin area has a hankering for ramps we will be picking next week. Price will be $1.00 per ounce, fresh. Email us here or message us on facebook.
Wednesday, May 1, 2013
Done Sugar'in
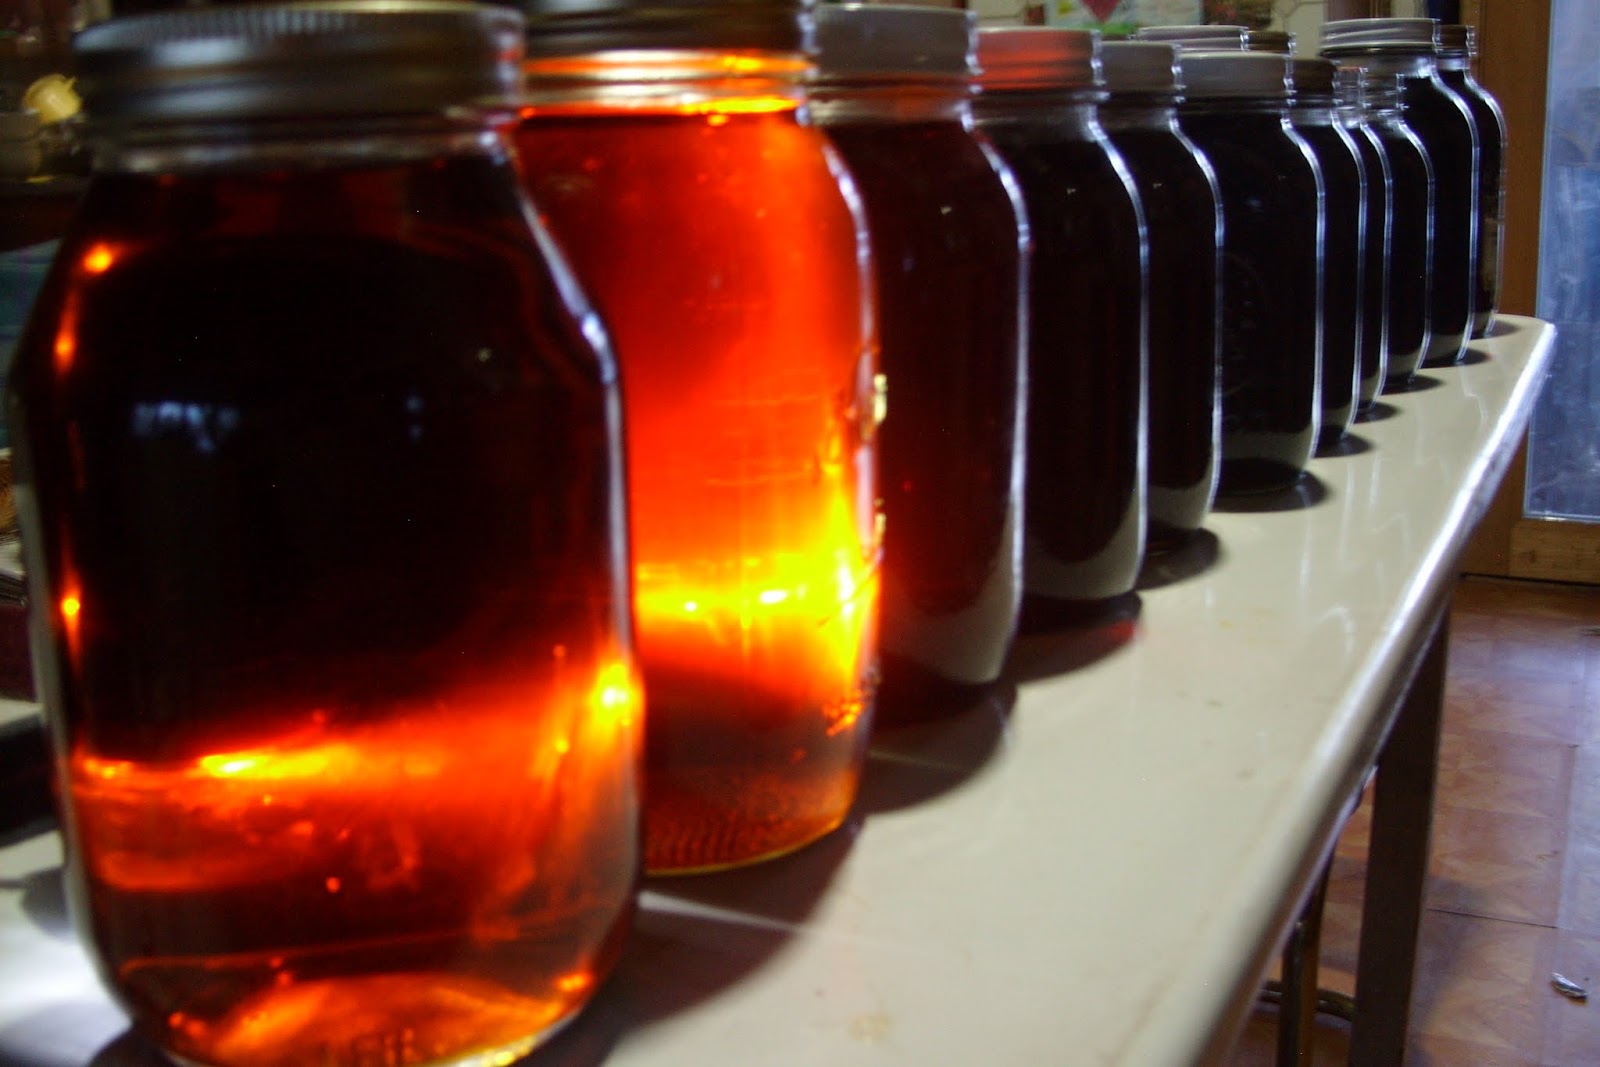
We ended our maple syrup season with our best year ever, making a total of 35 1/2 gallons of syrup. After last years 7 quart season it was a welcome change. Considering that maple syrup makes up a big part of our sugar supply it was nice to see a reserve building up in our pantry for times like last year. We like to be as self sufficient as possible and having our own sugar is one more step in that direction. We have made actual maple sugar some years but just kept it all as syrup this year. I did slip a few gallons of partially finished sap into a
fermentor to try a maple mead recipe I found. Of course as with most things that are cooked, the work starts when the cooking is done. All of the buckets, bags, and barrels have to be scrubbed out before they are stored away until next year. Maple sap contains 2-5 percent sugar which means everything it was in is slightly sticky. If not washed up properly it will all grow a lovely coat of mold. I got that job done yesterday and every thing neatly packed away. I want to make those little sheet metal roofs for all the buckets before next season. Keeping extra water from snow or rain out of the buckets will mean less time cooking to get rid of it. I have about 125 buckets left which I am replacing with the bags as the buckets get damaged or break. The only problem I have with the bags is the fact that they only last a couple years so there is that added expense. With syrup season over I can now concentrate on catching up on a few other projects. I have gotten all my seeds in the greenhouse going but now they are forecasting freezing temps at night again! I really do wish the weather would cooperate a bit.
Took a little time off from our chores to take Lily for a walk. Here she is with Ann . We took her to a park where she had a chance to interact with a few strangers and another dog. She really is quick to adjust to everything we have throw at her so far. Here is one more pic of the high water at Big Falls, Jump River.
fermentor to try a maple mead recipe I found. Of course as with most things that are cooked, the work starts when the cooking is done. All of the buckets, bags, and barrels have to be scrubbed out before they are stored away until next year. Maple sap contains 2-5 percent sugar which means everything it was in is slightly sticky. If not washed up properly it will all grow a lovely coat of mold. I got that job done yesterday and every thing neatly packed away. I want to make those little sheet metal roofs for all the buckets before next season. Keeping extra water from snow or rain out of the buckets will mean less time cooking to get rid of it. I have about 125 buckets left which I am replacing with the bags as the buckets get damaged or break. The only problem I have with the bags is the fact that they only last a couple years so there is that added expense. With syrup season over I can now concentrate on catching up on a few other projects. I have gotten all my seeds in the greenhouse going but now they are forecasting freezing temps at night again! I really do wish the weather would cooperate a bit.
Took a little time off from our chores to take Lily for a walk. Here she is with Ann . We took her to a park where she had a chance to interact with a few strangers and another dog. She really is quick to adjust to everything we have throw at her so far. Here is one more pic of the high water at Big Falls, Jump River.
Thursday, April 25, 2013
Modern Inconveniences
It is surprising how many everyday tasks we now use electricity to do. A good example that I never gave a thought to before we went off grid was making a slice of toast. Living with the amount of electricity that a couple of car batteries holds makes electric toasters out of the question. During cold weather the wood fire in our cook stove does the job in about the same amount of time an electric toaster would. The big difference is that when you put your bread on the stove, it is not advisable to walk away unless you like your toast very dark!
Making coffee is another example. An old fashion percolator does that job easily, on the cook stove in winter and often over a campfire in summer. We also have a bottle gas cook stove which is fine for the percolator but does not work that well for making toast. It is easy to understand why our ancestors abandoned many of the traditional methods of doing some of these sorts of tasks when electricity became commonly available. Convenience. It is so much easier to push down the lever on the toaster and go about your business compared to standing next to a hot cook stove and watching that your toast doesn't go up in smoke.If I put on a pot of coffee and run out side on some errand and forget about it, I end up drinking very strong coffee. Using electricity is really about saving time. All of the automated appliances save time for you to do other things. Not using all that electricity makes you stay with the task at hand. Most times, getting that slightly smokey slice of toast fresh off the fire and spreading some home made butter or jam on it is well worth the time spent standing still and watching for a bit.
Sunday, April 21, 2013
Lily, Our German Shepard Dog
Meet the latest addition to our family. This is Lily, a registered German Shepard Dog, who is nine weeks old. We got her from a friend of ours, Lisa Slattery, owner of Dirt Road Kennel. She is a sharp little pup, already comes to her name and sits for her treats. The house cats are not as impressed as I am!
On the maple syrup front, it is full speed ahead. It is rapidly approaching our best year ever. Even though the sugar content seems a little low the trees are producing sap at a tremendous rate. If by some chance the weather forecasters are right we should have at least another week of good syrup making weather. I have several hundred gallons of sap waiting right now and haven't collected yet today. Fire wood has become my big problem. I did not have nearly enough cooker wood lined up for this years run so I am making it on the go. The reason we are having such a good year is the weather of course. While I love it from a sugar making direction , UGGGG! I am sick of snow! Here is the view when I went out yesterday.
It was only a few inches but that was a few inches on top of the foot to a foot and a half that is still there. It has rained several times too and with that and the snow that has melted, when you step through the snow it is as likely as not that there is six inches of water under it. I've pulled over a hundred taps because the water is too deep to move around in easily. These were all taps that are a long ways from the cabin and it was too hard to get them emptied every day. I still have close to two hundred in so I won't run out of work .
Don't even ask about the green house. The cabin is over flowing with seed trays. I will have to keep them in here at least until they germinate. By then maybe I'll be done with cutting wood for the maple syrup cooker and I can start cutting for the green house heater.
On the maple syrup front, it is full speed ahead. It is rapidly approaching our best year ever. Even though the sugar content seems a little low the trees are producing sap at a tremendous rate. If by some chance the weather forecasters are right we should have at least another week of good syrup making weather. I have several hundred gallons of sap waiting right now and haven't collected yet today. Fire wood has become my big problem. I did not have nearly enough cooker wood lined up for this years run so I am making it on the go. The reason we are having such a good year is the weather of course. While I love it from a sugar making direction , UGGGG! I am sick of snow! Here is the view when I went out yesterday.
It was only a few inches but that was a few inches on top of the foot to a foot and a half that is still there. It has rained several times too and with that and the snow that has melted, when you step through the snow it is as likely as not that there is six inches of water under it. I've pulled over a hundred taps because the water is too deep to move around in easily. These were all taps that are a long ways from the cabin and it was too hard to get them emptied every day. I still have close to two hundred in so I won't run out of work .
Don't even ask about the green house. The cabin is over flowing with seed trays. I will have to keep them in here at least until they germinate. By then maybe I'll be done with cutting wood for the maple syrup cooker and I can start cutting for the green house heater.
Monday, April 8, 2013
Busy,Busy,Busy
Maple syrup season has finally gotten to our neck of the woods. It is later than it has been for quite a few years but it is shaping up to be a good year for production if the weather continues the way it has been. Of course, weather it the determining factor in sap production, it needs to be warm during the day and freeze at night for the sap to run. We have had those conditions here and the trees are giving us a nice run. Yesterday the average per tap run was a little over a quart of sap per tap. With almost 300 taps in that meant about 80 gallons of sap which should give us over two gallons of syrup once it is cooked down. My biggest challenge now will be cutting fire wood for the cooker fast enough to keep that sap boiling. We still have over two feet of snow in the woods in many places so working in that wet snow makes slow going.
Our other project is getting the green house set up and this years seeds started. I'll need about twenty flats again this year. The weather is not good for this project since those freezing nights mean I need to heat the green house. Guess I'd better get back to work, I need more fire wood!
Monday, March 25, 2013
Hauling Maple Sap
With warmer temperatures in the forecast, the maple trees should soon start filling buckets with their sap. I am certainly hopeful that happens so I thought I should prepare a bit for those gallons and gallons of sap. Many of the trees we tap are not close to any trail we can use to haul the sap on with mechanical means. Once some of the snow melts we might be able to use Ann's pony to haul some of it but there will still be areas where it has to be carried by hand. Five gallons of sap weights about 40 pounds. After a few dozen trips your arms begin to complain. All this lead to my recent project as pictured here, a carrying yoke. I tried it out here with six gallon buckets full of water so I had roughly 100 pounds on. I need to shorten the ropes so that I can grasp the bucket handle and thus divide the load between my shoulders and my arms.
I started out by splitting a aspen log in half with the chain saw. As you will see in the following pictures, I did almost all the cutting and carving with a chainsaw. Chisels, rasps, and knives were used to smooth every thing out. I did not want to spend a lot of time on this so some of the work was left a bit crude.If this turns out to be something I use a lot I will finish it off a little nicer! Some of the felt I made last week found a home as padding on this.
I determined the overall length by holding a bucket in each hand and then measuring the distance between their centers. To that I add a couple inches for insurance, I can always make it smaller, adding back on is tricky. At the center line I cut out a semi-circle big enough to fit comfortably around my neck. You have to start with a log large enough to leave a decent bit of wood behind the neck hole, this one was about 8 inches in diameter.
I next carved and whittled off every bit of extra wood that I could. Less wood, less weight. The carrying shafts on each end need to be at the center of the shoulder so that the load will pull straight down rather than twisting the yoke. I tried to shape the inside surface to fit uniformly across my shoulders so that the load will be spread evenly. After I had it fitting as well as I could I added a thick layer of felt as padding. I used material from a old tee shirt to cover and hold the felt in place.
The fabric is stretchy so that made it fairly easy to get all the wrinkles out. I used staples to attach it. If we have a good year I could easily have 700-800 gallons of sap to get in. A lot of that will need to be carried by hand so this should make that task a little easier. Since some of those trees are over 300 yards from the sap cooker every little bit helps.
I started out by splitting a aspen log in half with the chain saw. As you will see in the following pictures, I did almost all the cutting and carving with a chainsaw. Chisels, rasps, and knives were used to smooth every thing out. I did not want to spend a lot of time on this so some of the work was left a bit crude.If this turns out to be something I use a lot I will finish it off a little nicer! Some of the felt I made last week found a home as padding on this.
I determined the overall length by holding a bucket in each hand and then measuring the distance between their centers. To that I add a couple inches for insurance, I can always make it smaller, adding back on is tricky. At the center line I cut out a semi-circle big enough to fit comfortably around my neck. You have to start with a log large enough to leave a decent bit of wood behind the neck hole, this one was about 8 inches in diameter.
I next carved and whittled off every bit of extra wood that I could. Less wood, less weight. The carrying shafts on each end need to be at the center of the shoulder so that the load will pull straight down rather than twisting the yoke. I tried to shape the inside surface to fit uniformly across my shoulders so that the load will be spread evenly. After I had it fitting as well as I could I added a thick layer of felt as padding. I used material from a old tee shirt to cover and hold the felt in place.
The fabric is stretchy so that made it fairly easy to get all the wrinkles out. I used staples to attach it. If we have a good year I could easily have 700-800 gallons of sap to get in. A lot of that will need to be carried by hand so this should make that task a little easier. Since some of those trees are over 300 yards from the sap cooker every little bit helps.
Sunday, March 17, 2013
Home Made Felt
These are my three recent tries at felt making. Overall I am happy with them and I learned a lot about the process of making felt. The actual method of making felt is simple enough, get the wool wet and agitate. That does not indicate the amount of physical effort that must be applied however.On my first attempt I just tossed some globs of wool and llama fiber in the bottom of a plastic tub with hot soapy water and started smooshing them around. I did eventually felt them together.
As to making something useful, no, I did not. To make a piece of nice more or less flat ,smooth felt, a different method is needed. After doing fifteen minutes of extensive research (goggle!), I went back for another try. First off, separate out the fiber and lay them out in a thin layer the size you want. Now, make another thin layer, laid across the direction of the first layer. I built up six or seven layers until I had a pile about six inches thick as it lay.
You can get a rough estimate of how thick your finished piece will be by pressing down on the pile with your hand. This pile ended up making a piece of felt about 3/8 of an inch thick. I don't know if more work would have produced a thinner, and thus denser, finished piece or if that is a function of what type of fiber is used. My thinner pile of three layers made a piece about 1/8 of a inch thick. The three I have made thus far are all alternate layers of wool and then llama fiber.
After the fiber pile is as thick as it is wanted, wet it with very hot, soapy, water, but not too much. You want the fiber uniformly wet but with little excess water. Take my word for it, too much water will prevent the wool from forming a nice uniform layer. As you can see, this will shrink you pile down to a thin layer. I flattened it by patting it and pressing it down with my hands and continued until it starts to form a cohesive layer. It is still fuzzy and stuck to my rough hands when I pressed it.
At that point it is still a long ways from felt but it stuck together enough to slide it onto a sheet of plastic. Then I rolled it up like a jelly roll and slid heavy rubber bands around it every couple inches. I saw several sites on the web that used bubble wrap for this but I didn't have any so couldn't try that. After my first try I placed the pile of fiber on the plastic to start with. I am not sure if you would really need the rubber bands but it made it easy to keep it all rolled up.
Now the work part started. While putting enough downward pressure to flatten the roll a bit, I rolled it back and forth. I moved my hands from end to end as I went so that all parts were getting the same treatment. It is easy but gets tiring after a while. I switched and used my foot to roll it back and forth for a while. After about 15 minutes of rolling I stopped and took a peek. Not bad, but I thought I could do a little better. I gave it about 5 more minutes of rolling.
Here it is. The pile of fiber covered the tray so you can see how much shrinkage there was. The tray is 17 x 25 inches and the usable area of the felt is about 13 x 17 inches.Some areas along the edges did not get tightly felted so I will trim those off. I already have a have dozen projects in mind that will use some of the felt and I have a huge pile of fiber to work with. Ann has put in her order and is planning to make some house slippers with some. I have several ideas on improving my production methods. If anyone out there has experience making felt I'd love to hear from you.
As to making something useful, no, I did not. To make a piece of nice more or less flat ,smooth felt, a different method is needed. After doing fifteen minutes of extensive research (goggle!), I went back for another try. First off, separate out the fiber and lay them out in a thin layer the size you want. Now, make another thin layer, laid across the direction of the first layer. I built up six or seven layers until I had a pile about six inches thick as it lay.
You can get a rough estimate of how thick your finished piece will be by pressing down on the pile with your hand. This pile ended up making a piece of felt about 3/8 of an inch thick. I don't know if more work would have produced a thinner, and thus denser, finished piece or if that is a function of what type of fiber is used. My thinner pile of three layers made a piece about 1/8 of a inch thick. The three I have made thus far are all alternate layers of wool and then llama fiber.
After the fiber pile is as thick as it is wanted, wet it with very hot, soapy, water, but not too much. You want the fiber uniformly wet but with little excess water. Take my word for it, too much water will prevent the wool from forming a nice uniform layer. As you can see, this will shrink you pile down to a thin layer. I flattened it by patting it and pressing it down with my hands and continued until it starts to form a cohesive layer. It is still fuzzy and stuck to my rough hands when I pressed it.
At that point it is still a long ways from felt but it stuck together enough to slide it onto a sheet of plastic. Then I rolled it up like a jelly roll and slid heavy rubber bands around it every couple inches. I saw several sites on the web that used bubble wrap for this but I didn't have any so couldn't try that. After my first try I placed the pile of fiber on the plastic to start with. I am not sure if you would really need the rubber bands but it made it easy to keep it all rolled up.
Now the work part started. While putting enough downward pressure to flatten the roll a bit, I rolled it back and forth. I moved my hands from end to end as I went so that all parts were getting the same treatment. It is easy but gets tiring after a while. I switched and used my foot to roll it back and forth for a while. After about 15 minutes of rolling I stopped and took a peek. Not bad, but I thought I could do a little better. I gave it about 5 more minutes of rolling.
Here it is. The pile of fiber covered the tray so you can see how much shrinkage there was. The tray is 17 x 25 inches and the usable area of the felt is about 13 x 17 inches.Some areas along the edges did not get tightly felted so I will trim those off. I already have a have dozen projects in mind that will use some of the felt and I have a huge pile of fiber to work with. Ann has put in her order and is planning to make some house slippers with some. I have several ideas on improving my production methods. If anyone out there has experience making felt I'd love to hear from you.
Subscribe to:
Posts (Atom)