Friday, November 13, 2015

Root Cellar and Butchering

The root cellar is finally starting to look like we are prepared for winter. In the pic, some heads of cabbage hung for fresh eating all winter long and below them about 20 heads of celery. The celery is dug up and set, roots and all, in a container and watered occasionally.We have several barrels of potatoes packed in dry leaves and a cooler full of carrots.We don't have any apples this year but thankfully we have a lot of dried apples from last year.
   Monday was butchering day. We slaughtered one of the potbelly/kune cross sows. She has not raised a single piglet so it was time. I have the bacons out of the cure,rinsed, and drying now. As soon as they are dry they are going in the smoke house. The hams will be ready to smoke Saturday or Sunday.
  We also butchered four of our older doe rabbits. These we boned out to use with the pork trimmings for sausage. Since there is very little fat in the meat of rabbits ,the very fatty meat trimmed on the pork was a perfect mix.


The bowl on the left is the pork, right the rabbit. These were mature does and yield 13 pounds of meat from the four. I added enough pork to make a 35 pound batch. This is a fresh breakfast type sausage. It came out very nice, spicy, with black pepper,sage,ginger,thyme,nutmeg,salt, and the cure of course.I order mine on the internet. It is usually called Prague powder no.1. This is of course, a nitrate, which some people don't like. For myself, I would rather risk whatever health hazard there may be in the nitrate instead of facing the known fatality of botulism.


That is why nitrates are put into processed foods like this, especially if they are to be smoked. A smoke house eliminates oxygen and is the perfect temp. for botulism to grow. Nitrates prevent this.
  I stuffed the sausage into these meat bags with a canning funnel. Not the fastest job but it works.I get a lot of satisfaction from curing my own hams and bacon as well as sausage making. It saves a lot of money and most importantly we know what we are eating.


We are very careful and down right picky about our butchering practices. We want the animal calm right up to the moment of death and we want that to be as painless as possible. We try to keep the meat absolutely clean and if some dirt does get onto the carcass we immediately trim that off. While cutting up meat we trim out and discard any thing that doesn't look  wholesome. I wish we could somehow preserve this with out a freezer but if you want fresh year round that is the price.


Here's your cuteness for the day . This is one of Ann's kitties  and Lily helping her sort some Alpaca fiber. The cat is in love with the stuff. Lily is just try to hog the attention!


Sunday, October 18, 2015

I like the color variation on these Staghorn Sumac leaves.

 Homesteading, just like most other things, is repetition. Plant, Till, Harvest, Preserve, Plant, Till, Harvest, Preserve. This makes it hard to come up with new things to blog about after a few years! All of which is my excuse for posting so seldom lately. I love learning new stuff or more exactly, learning old ways. A couple of building projects have kept me too busy to do much else lately but we will be butchering some pot belly pigs soon and I'll try to do something on that. Mean while, this will be my 188th post. Many of them are how- to sort of post and ALL of my post are based on stuff I did not just passing on someone else's experience. Have a look around, I'll be back later.


Saturday, April 4, 2015

SPRING HARVEST SEASON

Winter buds of  Populus balsamifera
 Most people don't think of spring as harvest time but there are plenty of useful things to gather at this time of the year. The winter buds of Balsam Poplar are one of them. These buds contain a aromatic resin that is easy to extract and is a useful addition to salves. Also known as Balm of Gilead, it has several folk remedy uses. A little research on the internet will provide lots of info but they all miss what I like best about it. I has a very fresh woodsy scent. By the way, field guides all say it has sticky winter buds. I have found they are not sticky, until you crush them releasing the resin.
Here is another useful thing that I like to gather in spring. Sphagnum moss. Dry Sphagnum can hold up to 20 times it's weight in water. This makes it a great addition to potting mixes where it will help retain moisture. I also use it as mulch, especially around acid loving plants like blueberries. In early spring none of the other plants have started growing yet so it is easy to gather lots of it. I wring it out like a sponge as I stuff it in a bag so it is lighter to carry. I lay it out on screens in the greenhouse for a few days to dry.
Dry roots of Coptis groenlandica

While I am out in the bogs gathering Sphagnum I often come across another very  useful herbal medicine plant. This is Gold Thread which very accurately describes the part I am interested in, the roots. The tiny ,very bright gold or yellow roots contain berberine, which is anti-inflammatory and antibacterial. It's other common name, Canker Root, indicates it's traditional use which is to treat canker sores and cold sores.  My experience indicates a strong tea applied topically is quite effective.

My garden gives up a few things in spring too. These Jerusalem Artichokes wintered over just fine in the ground. Also known as Sunchokes, it's a good idea to harvest as soon as the ground thaws since they will start sprouting once the soil warms up. I am going to increase my planting of these this year. They are a great low input crop to use as animal feed. My rabbits and hogs are ga-ga about the tubers and cattle and horses love the stalks and leaves. I also enjoy them occasionally and there are lots of recipes for them.

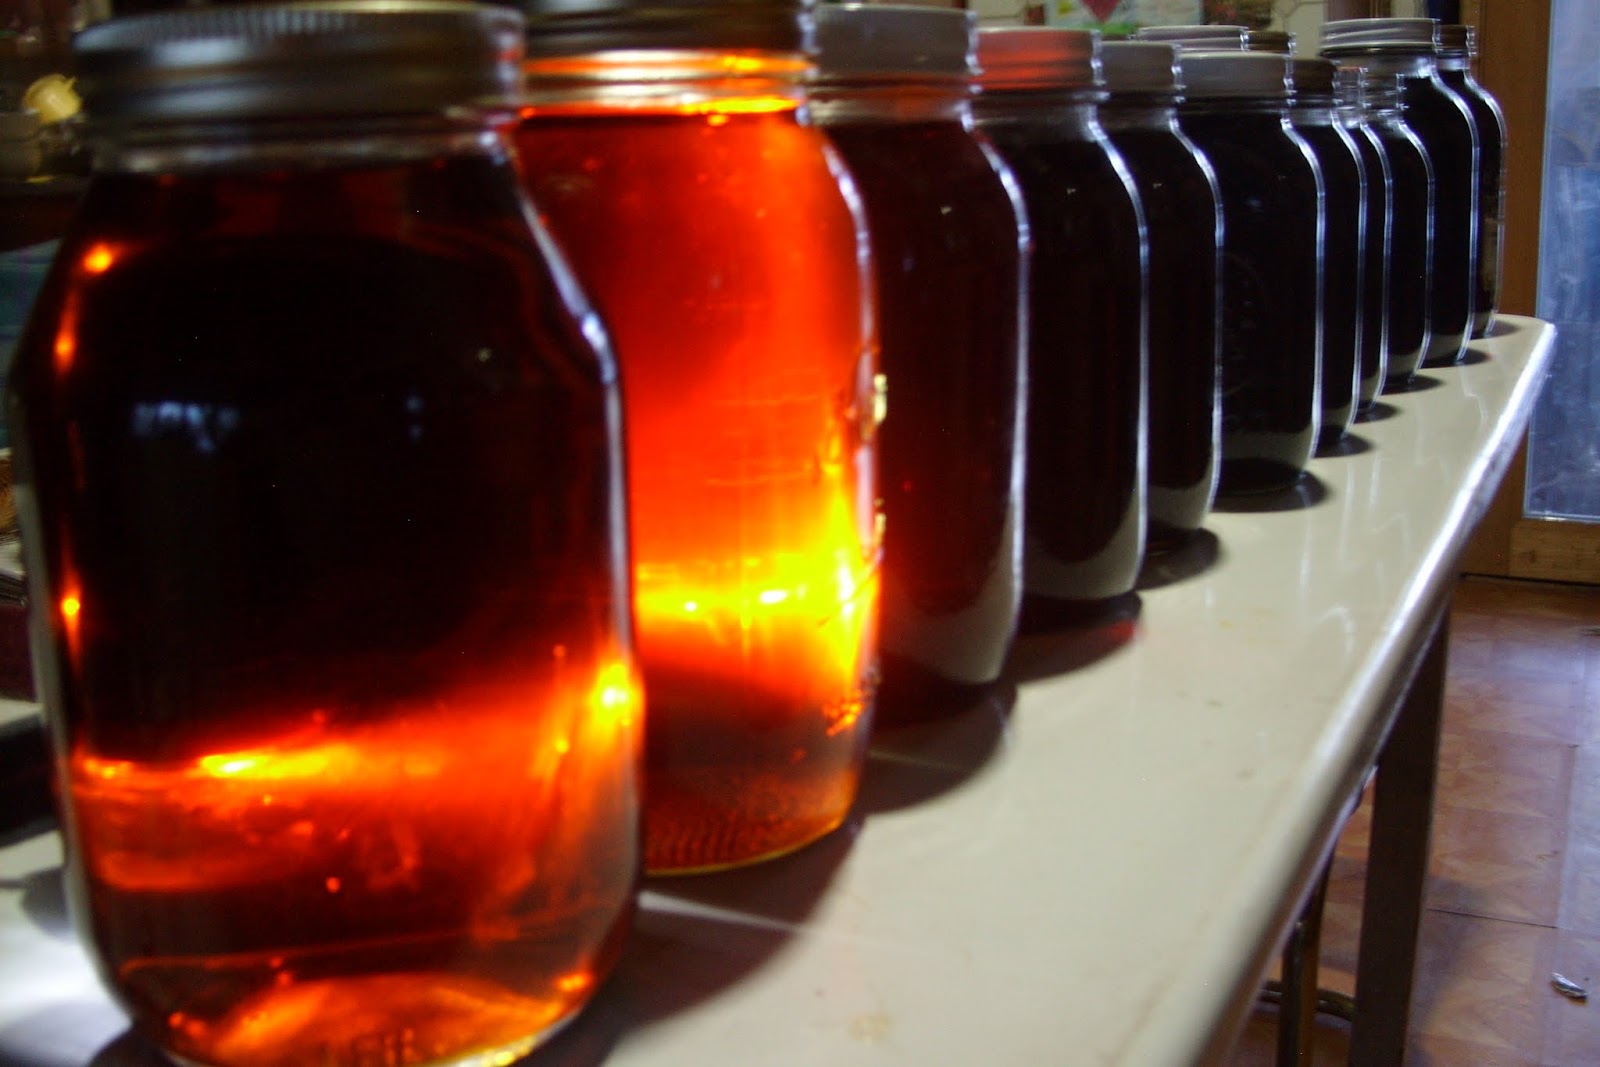
Well, I can't talk about spring harvest without talking about maple syrup. This has been a good year so far and the trees are still producing sap. I've made around 20 gallons of syrup so far this year. Since we make syrup every year and keep a lot of it for our own use, we have quite a bit stored from last year. I used some to make wine last year and might do that again this year.  Because of our surplus I am making sugar from most of this years crop. I have only sugared out about gallon and a half so far. I ended up with 10 1/2 pounds from that batch.
 I have about 12 gallons to sugar out today. That should yield somewhere around 95 pounds when done. This is darker syrup than my first batch so it will have a lot stronger flavor.
 It will be time for me to get all my seeds started next and lots of prep work to get the garden ready. Time for me to get to work.


Friday, February 13, 2015

Kick Spindle and Yarn Bowl

It has been a long winter and there are a couple more months to go here. The internet has provided some amusement and a few ideas to keep me out of trouble. This contraption was one I recently finished. It is called a kick spindle and is used to spin yarn much like that is done with a drop spindle. This is suppose to be a little faster than the drop spindle allowing for a much longer draw before the yarn has to be wound on. Needless to say my darling wife, Ann, will be the one learning to use it. As usual this was built with what I had as much as possible. This is proof that my shop is NOT a junk pile but a treasure room!


Here are the basic parts, a base  with some way to hold the shaft, the shaft with some type of flywheel, and the spindle. My base is a piece of maple burl I have saved for years for the right project. This was it. It's attractive and heavy which adds stability. I drilled this at a angle to receive the lower shaft bearing. A rubber band is glued unto the bottom edge to maintain clearance for the bearings inner race. That's the green line in the drill hole.I had a bronze bushing that I used for the upper bearing and the brass up right plate is drilled to accept that. That bushing is held in place by two rubber washers intended for a garden water hose. The small brass 'T' shaped piece is a bracket to hold the lower bearing in place.
The shaft is a piece of heavy walled brass tubing which happened to be the correct diameter to fit the bearings I had. The flywheel, a die cast 5 inch pulley, did not quite fit. I cut some thin plastic shims to center it  before locking it in place with the set screw. I gave it a coat of black paint except for the very edge. The area from the flywheel to the lower bearing is wrapped with two layers of leather lacing epoxy in place. The spindle is sized it slide snug into the main shaft. I have it drilled to take a pin but haven't needed it. This tubing is about 1/2 inch inside diameter. Again, this is what I had so that is what I used. The only items I bought for this were a set of four little rubber feet to help keep it from sliding around and a piece of 1/2 inch doweling to make the spindle.
I tapered the spindle down to about 5/16 inch and inserted a small brass cup hook. The large brass plated washed at the bottom is held in place with epoxy and backed with another smaller washer. This is both more and less elaborate than others I looked at on the web. Goggle images will show several dozen variations. Many have much simpler bearings or just a simple pin they spin on. I had them so I used them but I don't think they are that important as long as the shaft can turn freely it will work.

Here is another, simpler, project, a yarn bowl. Keeps the ball of yarn from leaving the area when the yarn is pulled. I bought this simple wooden bowl at a thrift store. I used a dremel tool with a wiz bit to cut the spiral. Sand, sand ,sand, and then some decorative painting. A coping saw or a heavy rasp could be used to cut the spiral too.


Monday, December 29, 2014

DIY BERRY RAKES

One of the high points of 2014 was our trip up to the shores of Lake Superior to pick wild blueberries.Actually there were two trips because there was such a fantastic blueberry crop we couldn't resist going back for seconds. Nearly every bush was covered just like the one in my picture here.
   Our first trip up was a leisurely trip with numerous stops for yard sales and coffee breaks. We didn't reach our favorite picking spot 'till well after noon.

Since this was a Sunday we had to get back home at a reasonable time so we only picked for about 2 1/2 hours. In that time we got over three gallons of berries. As we loaded up and headed home we talked about coming back again the next weekend. Blueberry crops this good don't come along that often so it was a easy decision. I got to thinking about it as we went home and decided if we were coming back we would come back loaded for bear....BERRY RAKES!


One small detail to work out though, I only owned this one little rake that is actually designed for cranberry picking. It being a yard sale purchase that I had never actually used I went out in the woods around our cabin to try it out. There were a few scattered bushes with berries and it seem to do the job but not very well. Time for a little internet research which was very productive. Lots of blueberry rakes both antique and new for sale. After studying the pictures I went out to the shop to see what I could come up with.

Having worked as a carpenter most of my life I went with the wood design first which was what most of the antique ones were made of. I took a piece of nice straight grain Douglas Fir and cut saw kerfs ever 1/4 inch leaving a 'tooth' about 1/8 inch wide with 1/8 inch spaces between them. I then made  a box around that and added a handle.
Some hand sanding to smooth everything out and a coat of bee's wax finished it up. I didn't have another nice piece of the Douglas Fir to make another like it so I shifted gears.

All of the modern rakes were metal so I followed. I used common 16p. nails for the teeth. I punched holes in a piece of sheet metal spaced about 1/8 inch apart to hold the nails in the correct position and then brazed them on. I gave the teeth a upward slant which turned out to be a good thing. Both of my homemade rakes worked well but the metal rake was better because the berries stayed in it . The wood rake's bottom is flat. If it is tipped downward your berries roll out.

This was easy enough to compensate for, I simply emptied it into my bucket after each pass. This did make it slightly slower than using the metal rake. With it you could make four or five passes and then empty it into your bucket. Not a big deal but I would correct it if doing it over by adding the rake part onto the bottom creating a step down instead of using one continues piece.The biggest draw back to using the rakes is the amount of debris you get along with your berries.


To clean our berries I used two methods. First I winnowed the berries by slowly poring them in front of a fan. This removed most of the leaves and small debris but not the green berries. I floated those out by simply dumping berries in a bucket of water and skimming off the green berries which float.We still did some hand sorting and cleaning but probably less than we did on our first hand picked batch. When all was said and done we put 10 gallons of wild blueberries in our freezer. 3 from the first trip and 7 from the second trip with about 5 hours of time spent actually picking. Ann said she will make her delicious Wild Blue Berry Strata for New Year's Day breakfast. I'm already looking forward to 2015!

Friday, November 14, 2014

DIY Pallet Barn

  We recently decided we needed more shelter for some of our expanding herd of critters. This little barn built from pallets is working out well. The pallets form the basic structure. Over the pallets I tacked on a layer of cardboard to act as padding for the plastic agricultural film used as the weather proofing finish.
  I started out by setting six pallets up on edge to form the shape I wanted for each arch. After I had established the angle that  each set of pallets met at, I marked out a piece of chipboard to match that angle. Mine worked out with the bottom joint and the second joint being different from each other and the center top joint matching the second.
  For the first and last arch, two sets of these chipboard gussets are needed. For any arches between those, one set is needed for each arch. I built the first arch laying down. After nailing the chipboard gussets on the top edge, I slide the gussets underneath the pallet arch and nailed down thru the pallet and gusset. This leaves the nails sticking out so be careful when raising the arch.
I only built the first arch laying down. The complete arch is fairly heavy and needs to be temporarily cross- braced to maintain it's size and shape while being stood up. Once up it needs to be leveled and tweaked to keep the sides parallel. I didn't pay enough attention to that on mine and had to fight to keep every thing lined up later.Several things to keep in mind when building with pallets, especially used pallets, they are not necessarily square or exactly the same as each other.While all the pallets need to be the same basic size, mine were all 40 x 48 inches, they did vary. Some had thicker or thinner boards, some were not flush with the frame.These differences have to be accounted for as you go. If you want easy and exactness, go buy lumber!
  With the first arch standing and adjusted I nailed on my bottom row of pallets with the correct gusset between them. Add a piece of the same chipboard at the bottom so they are evenly spaced.After this bottom row is on, take the time to level and adjust so that the sides are parallel.
With the first arch standing and the bottom row lined up and secured the second row of pallets can be added to the number two arch. The third set of pallets to complete that arch are then put on. I tried to keep the outside of the pallets lined up and left any differences show up inside. There is a cross brace between the tops of pallet set number two to help prevent the arch from spreading under weight.  Most of these pallets had hardwood frame members. Since this is difficult to nail through by hand I used a air powered nail gun.
 If I hadn't had that I would probably drill and bolt the pallets together.Since I planned on covering this with a tarp or plastic film I knew I had to cover the pallets to prevent the odd nail or sliver of wood from pocking through. My first choice would have been some used carpeting but nothing showed up so I went with what I could get, cardboard. I tacked a layer of cardboard over every surface the tarp would touch. The tarp idea fell through so I bought a roll of heavy agricultural film.
This is the type of film used by farmers to cover bunker silos and is available in large sizes. While sort of pricey, it is strong and fairly durable. I do plan on recovering this in a couple of years with a industrial type tarp.  Both ends are also pallets with a few pieces of lumber where needed. I had some used windows. There is one interior partial divider which greatly stiffened the structure. This formed the two pens at one end. We have had 18-24 mile per hour wind gust since it was covered with no problems.
The long edges of the plastic are not nailed but were left about two feet longer than needed and covered with 8-12 inches of soil. With about two tons of soil holding it tightly to the ground it should stay put. I nailed the ends and later also taped them with compatible tape.
  We have our pigs and rabbits in here now. I did spend some extra money for rubber cow mats to surface the pig pens. Hopefully this will be enough to prevent them rooting it up. So far it seems to be working.
Here is mama "Petunia" with her litter of 8. They seem to like their new accommodations. We add some more bedding every day or so and they grind it up and make it fluffy. Now you can't see them in their pen when they are sleeping. You can hear them though, Petunia snores!
 This project requires some basic carpentry skills and some physical strength. Pallets are not horribly heavy but they are awkward when you are holding them over your head with one hand and nailing with the other. I did this project solo but a helper would be advised if possible. I ended up with a 11ft.7inch. X 16 ft.8inch  structure. Each arch was made from 6 pallets. I do not have plans but if you have a question I will try to help.


Saturday, November 1, 2014

Mother Nature's Medicine Chest


    This is a good time of the year to replenish or replace some of the items in your natural medicines cabinet. Don't have a natural medicines cabinet? Well, this is a good time of the year to start one! The four items in the pic are four that I try to keep on hand . Lower left , a little hard to see, are Turkeytail Mushroom, Trametes versicolor.It is the subject of much scientific research and is credited with helping rev up the immune system.
  Above the Turkeytail  is Chaga, Inonotus obliquus.The golden colored part is the interior, the black charcoal looking surface is the exterior. Chaga grows mainly on birch trees. In my area I find it mostly on Yellow Birch but in other areas it is more common on Paper Birch. Chaga is another widely researched member of the fungi world. It has been used medicinally for centuries and makes a pleasant tasting beverage. It is generally used for it's anti oxidant qualities.We put a few small pieces in our coffee percolator once a week but I know people who drink it instead of coffee. I'm too much of a caffeine addict to go that route!
 To the right of the Chaga ,I show a bag of Usnea sp.. There are a half dozen or so species of this lichen in my area and as far as I have been able to determine, they are interchangeable for medicinal purposes.One species common in this area is Stag horn Lichen, another is Old Man's Beard. I find the Staghorn  on Black Spruce most often. All of these lichens seem to like areas with fairly high humidity such as Black Spruce- Sphagnum moss bogs. Usnea  species are known to absorb airborne contaminants so judgement is required in choosing harvesting locations. Try not to harvest in areas with a lot of human activity that puts pollutants into the air. Usnea species all contain Usnic Acid which is a strong antibiotic and anti fungal agent.There are some suggestions that it should only be used externally but I have used a mild tea orally for a few days at a time.
  The bright red mushroom in front is Ganoderma tsugae, one of the two species of Ganoderma mushroom known as Reshi. The more common Ganoderma lucidum generally grows on hardwoods while the tsugae grows on Hemlocks.They are widely distributed through out the world. In traditional Chinese medicine this is known as Ling Chi or Ling Zhi and has been used for thousands of years.This is the "mushroom of immortality"and is believed to enhance overall wellness and to support the cardiovascular system.
  I keep and use all four of these health power houses. While the scientific research continues with all of these materials, in this country they are not considered to have any therapeutic benefit. Is this because no substance has been isolated that can be patented as required by drug companies to insure their profits? Used in moderate amounts,none of these have harmed me. Can I prove they help me? No, but I am willing to err on the side of thousands of years of human experience that say these are good for me.

Monday, September 22, 2014

Autumn in Wisconsin

 Here is a little bit of the fall foliage. This clump of maple is just one of hundreds showing off great color this week. There is not much rain in the forecast so the leaves should hang on for a while.We have been out foraging a lot the last few weeks. The hazelnut crop is very disappointing this year and the bears are really working them hard so it was a race to see who got them first. Sorry to say the bears beat us by a mile! Oh well, that is how it goes. We scouted a grove of butternut trees but it was another disappointment. Most of the trees seem to be suffering from butternut canker and probably won't survive much longer. None of the dozen or so trees appeared to be bearing any nuts.
 We did score on a huge patch of wild mint while looking for those butternuts. The native wild mint makes a great tea.
 We have gotten some nanny berries but were late going for elderberries and found most had already been eaten by the birds.
 Our foraging timing has been off this year and we have not got out in time to harvest several things like the elderberries. We did have a good wild rice harvest bringing home about 500 pounds of green rice. That should finish out to at least 150 of finished rice. Our biggest problem was the constant rain which made getting the rice dry next to impossible. Some of it ended up being dried over a wood fire in my maple syrup pan.
I'll work on finishing the rice after we get done bringing in our firewood for the year. I will be putting up a new shed for our rabbits yet this fall. It will be built mostly with pallets so I'll be doing a post on that and I want to tell about our blueberry season and my DIY berry rakes. We also have a miniature pig due to litter within a few days so that should make a interesting post too.  That's about it for now except here is one more pic of Lily waiting for me to throw a stick for her.


Wednesday, August 13, 2014

Hen of the Woods

This is 11 pounds of Hen of the Woods mushroom. Grifola frondosa, which also goes by the common name Sheep's Head, is a fantastically good eating mushroom. Add to that the fact that it would be almost impossible to mistake anything else for it and you will understand why this is one of my favorites. This is the third year we have picked from the same area so if you find one remember to look again next year. Specimens over 100 pounds have been found but this 11 pound cluster is fairly normal. This one is safely dried and stored away, ready to add it's distinctive touch to many meals to come. I like to powder some of the dried mushroom and use it as you would use a spice in almost any meat dish. A Cream of Mushroom soup made with these has the unfortunate side effect of making any other mushroom soup you try bland and unappetizing. Look for Hen of the Woods near the base of  big,old hardwoods, especially oaks.

Saturday, August 2, 2014

Wool Gathering

  Here I am with my trusty helper,Lily. Fortunately watching me type turned out to be boring so she has gone back to harassing the cat. The cat doesn't seem to mind that much as she only occasionally uses her claws to discourage Lily's interest.
   The most viewed post for this week was one I called, DIY Drum Carder. I have had several request for plans from that post and am sorry to say I do not have any. Most of my projects come about when a need runs into a pile of junk within the depths of my shop. I very seldom start out with more than a rough idea of how the thing is going to work. I just start building with what ever I have on hand that will do the job. Sometimes a project will stall due to lack of parts and sit for months until that  AH HA moment when something shows up that will work.The point I'm trying to make is that these projects are not necessarily designed all that well but were designed to work with what I had.
  All that said, I am perfectly happy to answer questions about these projects, just don't expect A to Z directions on how you should build them.
Here is one pic of part of our garden. Closest row cabbage, broccoli in next row, then Poc Choi, garlic in the back row. This years garden is doing very good so far. If we don't get a early frost it will be the best in quite a few years. The cucumber beetles have wrecked one variety of squash but the other varieties of squash and pumpkins seem to be more resistant and have not shown signs of wilt yet despite fairly high counts on the cucumber beetles. I will not plant that particular variety of squash again. Variety selection can mean the difference between a good crop and a poor crop when it comes to organic gardening. No sign of any blight on tomatoes and potatoes which has had me worried since it has been a wet ,humid summer. Those conditions foster blight and wilt problems.
These are black raspberries which are doing good this year as all the berries seem to be doing. I even have blossoms on my lingon berries which is a first. I re-acidified the soil around them and added lots of bark mulch/compost so maybe that's what they needed. I've also started building my perma- culture beds around the existing raspberry plantings. The idea there is to duplicate the conditions I see wild berries doing good in. I am mixing large amounts of wood, both solid logs and chipped brush, with soil in a mound around the canes.I give the whole thing a big dose of mushroom spawn to help start breaking down the wood.So far it seems to be working very well for the raspberries and I will be trying it on some of my new blueberry plantings this year. I'll get some pics when I do that and show a in-depth look at what I'm doing.

Monday, July 28, 2014

OK, Let's Try That Again.

I am going to try this blogg'in thing again on a more leisurely schedule, one a month or so. I was going at it there for a while with two or three post a week and just burned out. It is hard to come up with new topics constantly since homestead life tends to redo the same basic things each year. I choose the pic for this week cause pie is what's for breakfast today! Fresh baked wild blueberry pie to be exact.
  We did a short road trip north to the shore of Lake Superior this past weekend for some berry picking. This is turning into the best berry year I have seen for a while. The trip was very relaxed and laid back so we did not pick nearly as many berries as we could have but it was a great weekend. We will probably make another serious berry picking run this coming week and stock up on these blue beauties while we can. We also managed to pick a few quarts of nice Juneberries while there. The Juneberry crop near us was a fail this year. Nanny berries look good right now as do the hazelnuts. Our gardens are looking good,especially all the cabbage,broccoli, kohlrabi,and even those little green balls of death, brussels spouts.My new horseradish planting seems to really be taking off and the herb section has produced great.
  I will be getting some current photos uploaded soon and then I think I will revisit some of the more popular post and do a update on those.

Monday, May 20, 2013

Catch'in Up

Things are getting back to normal around here so I should have time to write a bit again. We have finally gotten into a more normal weather pattern and haven't had any snow or freezing temperatures for several weeks now. I managed to keep all my transplants in the greenhouse going and have started setting out all the cabbage, broccoli, kohlrabi,and brussels sprouts. All of those can take cooler temperatures as can the onions which we are started on .Potatoes and peas will be on the schedule after that and then the warm weather crops like tomatoes, corn, and peppers. We took a few days over the last few weeks for some foraging. Ramps are up in all of our usual picking spots but we haven't picked any yet. Ostrich fern fiddle heads should be up this week if temperatures stay warm. Not much for mushrooms yet although morels are about due to appear. We have been busy with a bunch of new projects but I'll save those for later this week. If anyone in the northcentral Wisconsin area has a hankering for ramps we will be picking next week. Price will be $1.00 per ounce, fresh. Email us here or message us on facebook.

Wednesday, May 1, 2013

Done Sugar'in

We ended our maple syrup season with our best year ever, making a total of 35 1/2 gallons of syrup. After last years 7 quart season it was a welcome change. Considering that maple syrup makes up a big part of our sugar supply it was nice to see a reserve building up in our pantry for times like last year. We like to be as self sufficient as possible and having our own sugar is one more step in that direction. We have made actual maple sugar some years but just kept it all as syrup this year. I did slip a few gallons of partially finished sap into a
fermentor to try a maple mead recipe I found. Of course as with most things that are cooked, the work starts when the cooking is done. All of the buckets, bags, and barrels have to be scrubbed out before they are stored away until next year. Maple sap contains 2-5 percent sugar which means everything it was in is slightly sticky. If not washed up properly it will all grow a lovely coat of mold. I got that job done yesterday and every thing neatly packed away. I want to make those little sheet metal roofs for all the buckets before next season. Keeping extra water from snow or rain out of the buckets will mean less time cooking to get rid of it. I have about 125 buckets left which I am replacing with the bags as the buckets get damaged or break. The only problem I have with the bags is the fact that they only last a couple years so there is that added expense. With syrup season over I can now concentrate on catching up on a few other projects. I have gotten all my seeds in the greenhouse going but now they are forecasting freezing temps at night again! I really do wish the weather would cooperate a bit.
Took a little time off from our chores to take Lily for a walk. Here she is with Ann . We took her to a park where she had a chance to interact with a few strangers and  another dog. She really is quick to adjust to everything we have throw at her so far.  Here is one more pic of the high water at Big Falls, Jump River.


Thursday, April 25, 2013

Modern Inconveniences

It is surprising how many everyday tasks we now use electricity to do. A good example that I never gave a thought to before we went off grid was making a slice of toast. Living with the amount of electricity that a couple of car batteries holds makes electric toasters out of the question. During cold weather the wood fire in our cook stove does the job in about the same amount of time an electric toaster would. The big difference is that when you put your bread on the stove, it is not advisable to walk away unless you like your toast very dark!
 Making coffee is another example. An old fashion percolator does that job easily, on the cook stove in winter and often over a campfire in summer. We also have a bottle gas cook stove which is fine for the percolator but does not work that well for making toast. It is easy to understand why our ancestors abandoned many of the traditional methods of doing some of these sorts of tasks when electricity became commonly available. Convenience. It is so much easier to push down the lever on the toaster and go about your business compared to standing next to a hot cook stove and watching that your toast doesn't go up in smoke.If I put on a pot of coffee and run out side on some errand and forget about it, I end up drinking very strong coffee. Using electricity is really about saving time. All of the automated appliances save time for you to do other things. Not using all that electricity makes you stay with the task at hand. Most times, getting that slightly smokey slice of toast fresh off the fire and spreading some home made butter or jam on it is well worth the time spent standing still and watching for a bit.